Log In Register

justanother DIY, T5, stealth, micro-cab, bozo style!

  • Thread starter Thread starter justanotherbozo
  • Start date Start date
  • Tagged users Tagged users None

justanother DIY, T5, stealth, micro-cab, bozo style!

justanotherbozo 40 Replies 17,411 Views
Page 1 of 3 · Replies 1–20 of 41
justanotherbozo

justanotherbozo

Posts
952
Reactions
1,571
Joined
Jul 3, 2009
Points
143
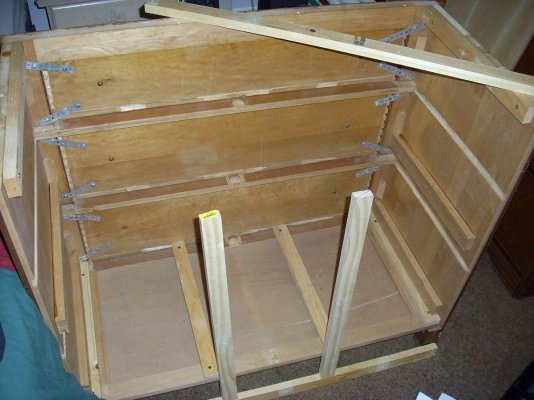
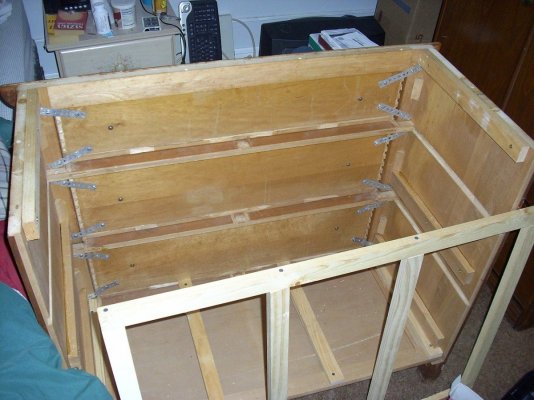
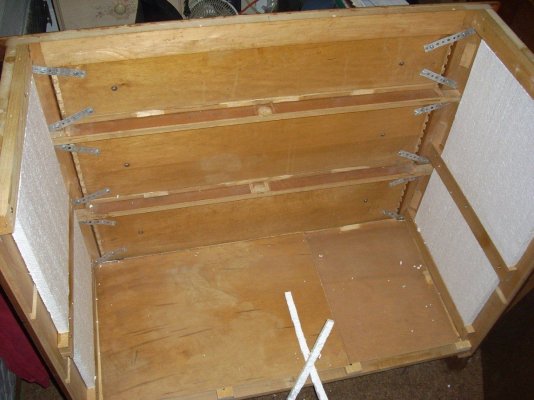
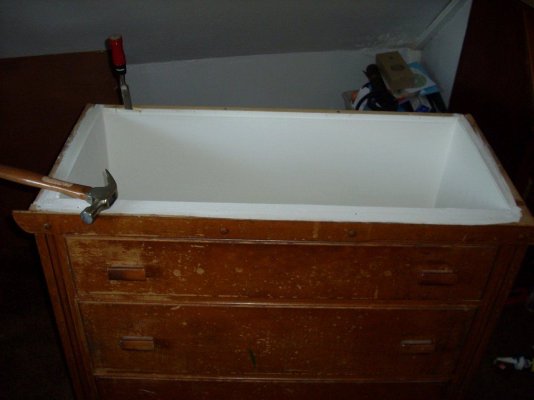
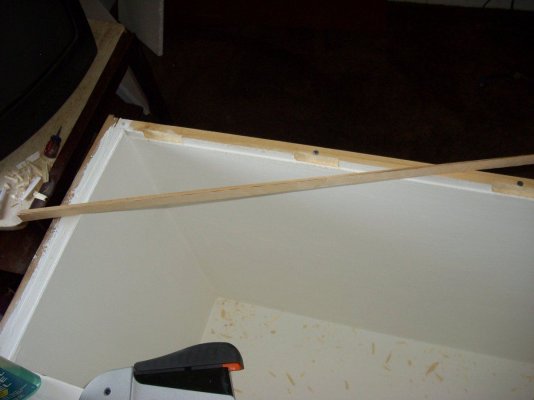
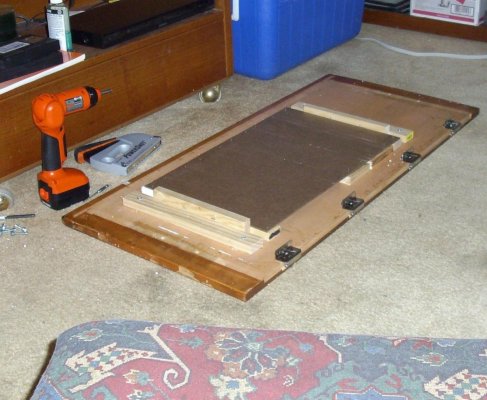
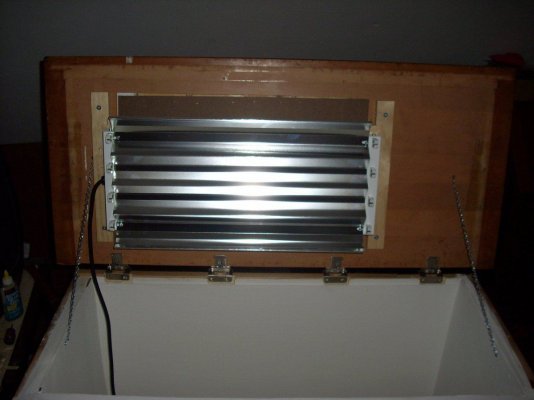
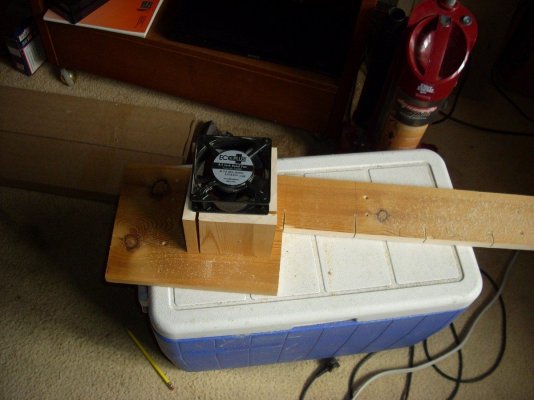
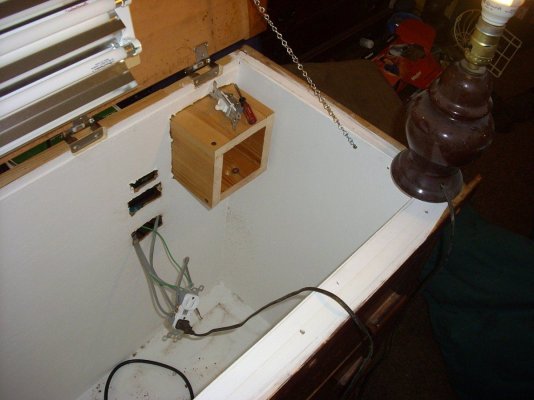
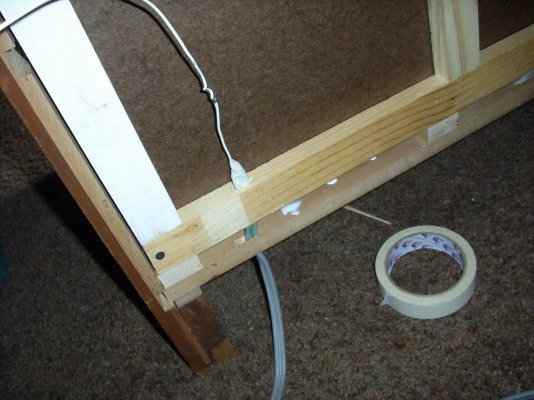
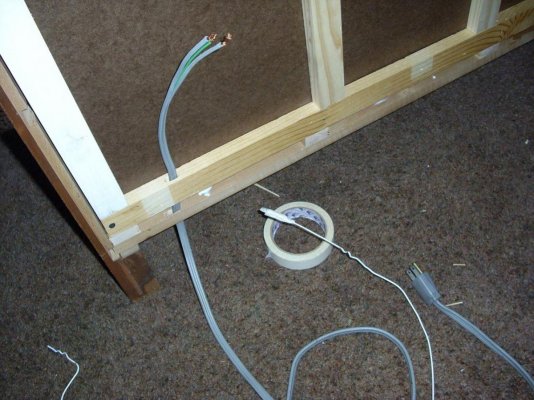
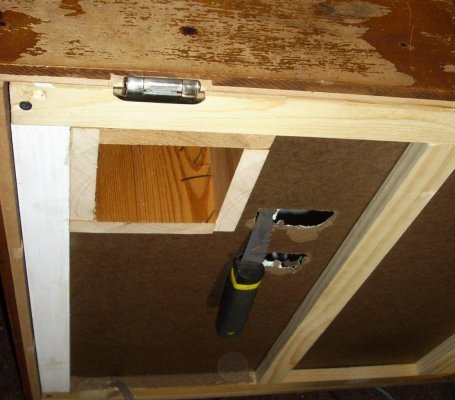
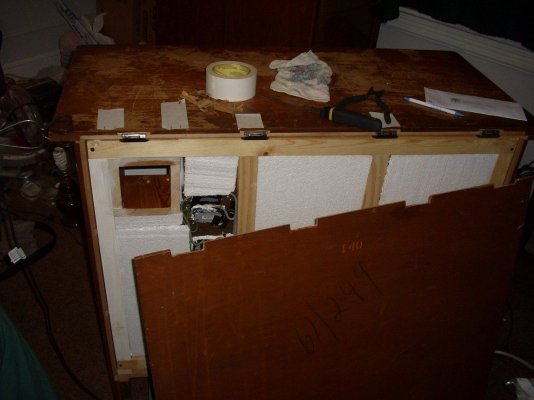
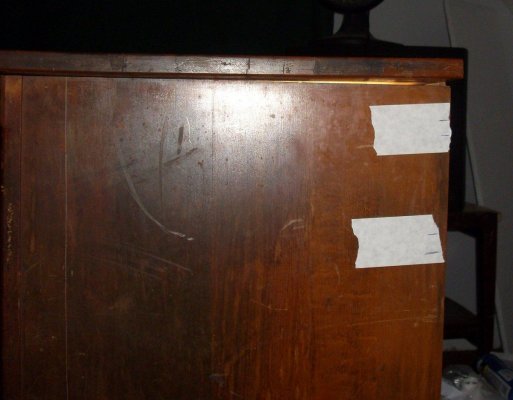
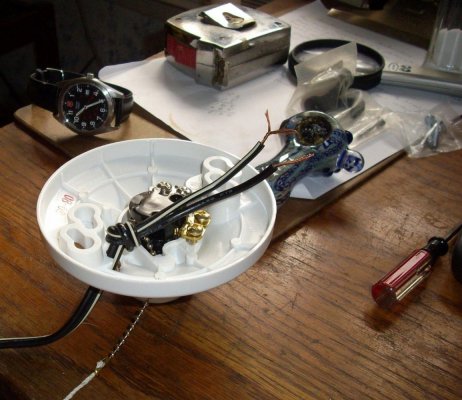
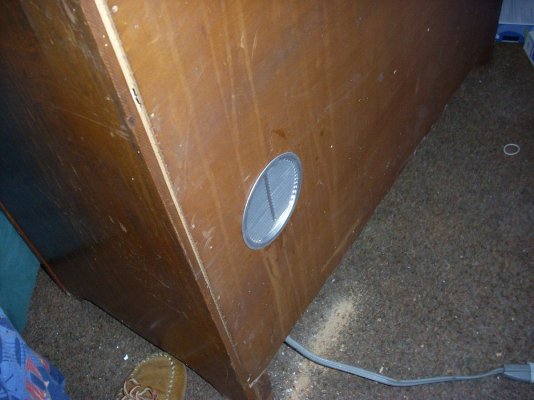
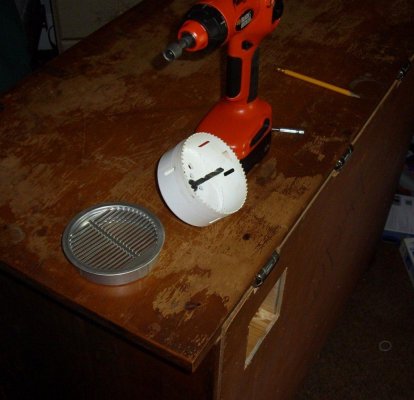
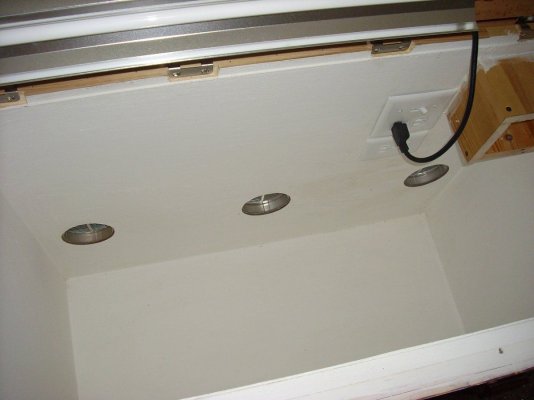
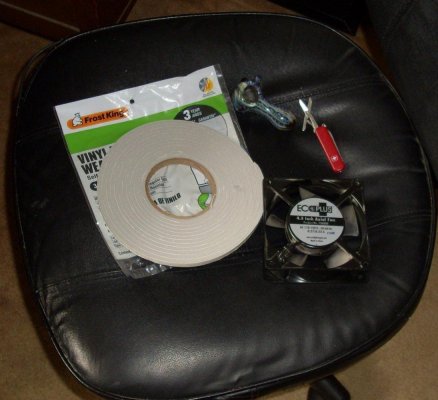
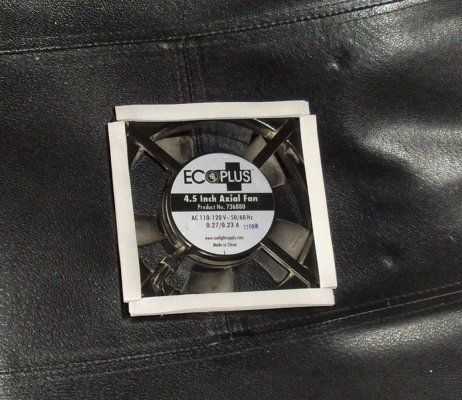
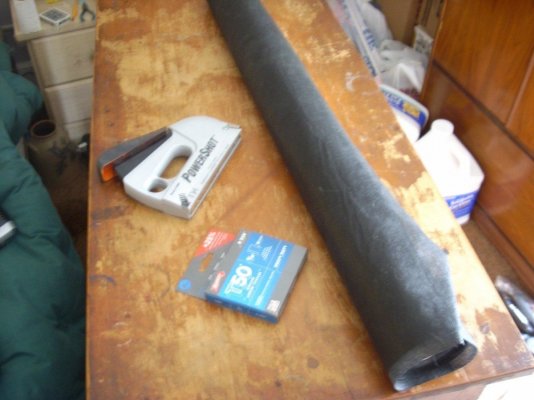
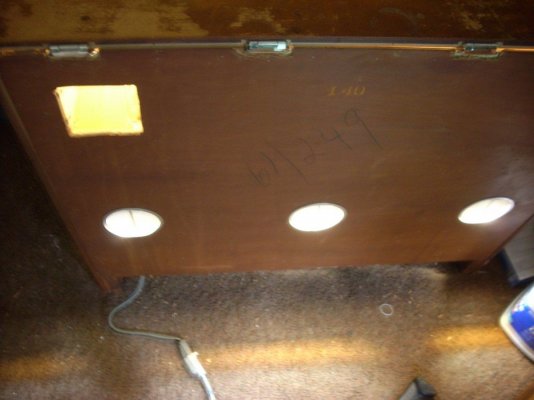
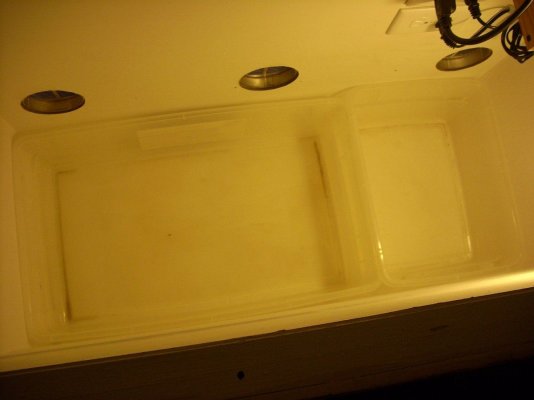
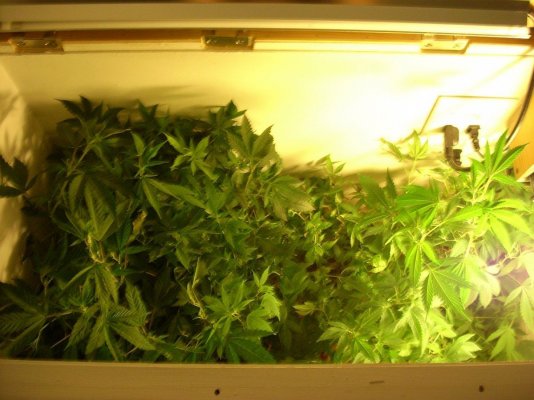
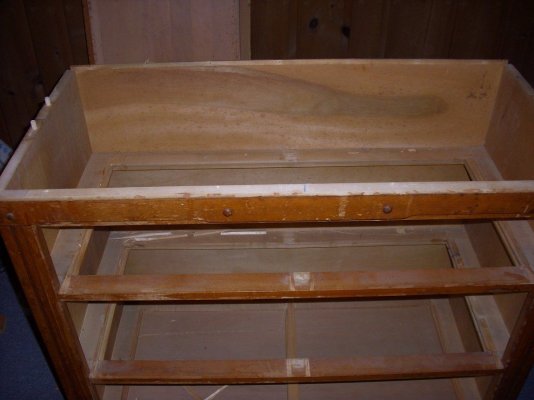
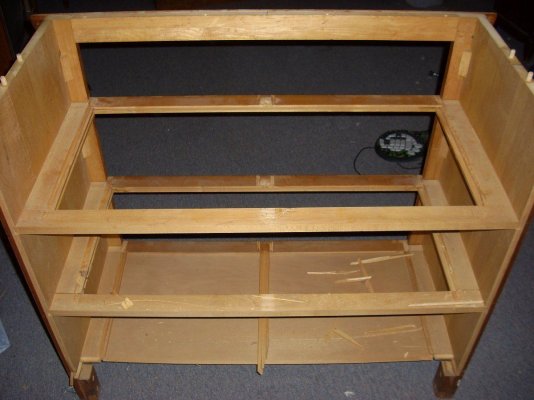
this is my version of a dresser conversion, ...i was facing a move
a while ago and i knew i'd be moving into a smaller place so i'd
be losing my grow space, so i knew i'd need to come up with
some solutions to veg and flower my ladies.

anyway, this is the mother cab side of my little, and i do mean little,
marijuana factory, lol.

hope y'all like it, lol.
 

Attachments

  • justanother-diy-t5-stealth-micro-cab-bozo-style-2.jpg
    justanother-diy-t5-stealth-micro-cab-bozo-style-2.jpg
    152.9 KB · Views: 1,399
  • justanother-diy-t5-stealth-micro-cab-bozo-style-3.jpg
    justanother-diy-t5-stealth-micro-cab-bozo-style-3.jpg
    109 KB · Views: 1,313
  • justanother-diy-t5-stealth-micro-cab-bozo-style-4.jpg
    justanother-diy-t5-stealth-micro-cab-bozo-style-4.jpg
    131.9 KB · Views: 1,291
  • justanother-diy-t5-stealth-micro-cab-bozo-style.jpg
    justanother-diy-t5-stealth-micro-cab-bozo-style.jpg
    152.1 KB · Views: 1,519
here's some more pics, just to get the ball rolling.
 

Attachments

  • 005.jpg
    005.jpg
    149.1 KB · Views: 1,168
  • 006.jpg
    006.jpg
    135.3 KB · Views: 1,137
  • 007.jpg
    007.jpg
    153.5 KB · Views: 1,089
  • 008.jpg
    008.jpg
    158.7 KB · Views: 1,042
here you'll see what i did was to create an inner chamber with
foam insulation between the walls. ...my intent was to muffle
and insulate.

note the hole in the frame, illustrated with the pocket knife,
...i made the hole to accept the wiring.
 

Attachments

  • 011.jpg
    011.jpg
    145.2 KB · Views: 946
  • 012.jpg
    012.jpg
    119.9 KB · Views: 966
  • 009.jpg
    009.jpg
    134.7 KB · Views: 990
  • 010.jpg
    010.jpg
    131.2 KB · Views: 1,012
my original plan was to salvage the bottoms of the drawers and
use them to skin the inner chamber, ...unfortunately, it wasn't
enough material so i had to buy a sheet of masonite.

that might not be the right name but i got it at Lowes for less than
$8.00 for a 4 X 8 sheet and it is about 1\8 of an inch thick,
perfect for my purposes!
 

Attachments

  • 013.jpg
    013.jpg
    147.2 KB · Views: 899
  • 014.jpg
    014.jpg
    141.6 KB · Views: 874
  • 015.jpg
    015.jpg
    140.3 KB · Views: 846
  • 016.jpg
    016.jpg
    130.4 KB · Views: 829
...note that i sealed all seams with a paintable calk.
 

Attachments

  • 017.jpg
    017.jpg
    101.6 KB · Views: 804
  • 018.jpg
    018.jpg
    126.6 KB · Views: 808
  • 019.jpg
    019.jpg
    147 KB · Views: 776
  • 020.jpg
    020.jpg
    87.3 KB · Views: 765
...here you can see i've chiseled room for the hinges and, as in
all DIY, conversion builds, i dealt with several wrinkles.

these pics illustrate one such as, once assembled, the lid didn't
fit squarely, it wobbled, so i cut a wedge shaped piece of wood
to compensate. ...not a perfect solution, but a workable one.
 

Attachments

  • 022.jpg
    022.jpg
    92.3 KB · Views: 734
  • 024.jpg
    024.jpg
    83.7 KB · Views: 707
  • 023.jpg
    023.jpg
    79.4 KB · Views: 716
  • 021.jpg
    021.jpg
    61.1 KB · Views: 757
...this is the light i bought for this cab, a 4 bulb, 2 foot T5 HO fixture
running 24watt bulbs for a total of 96watts.

and this is the underside of the lid, with hinges attached, and
my custom mounting solution, lol.

note the pocket i left in the foam to accept the excess power cord.

note also that almost everything i do is done 'on the fly'
as it were and almost always just 'by eye', ...we don't need
no stinkin' measurements', lol.
 

Attachments

  • 026.jpg
    026.jpg
    161.4 KB · Views: 699
  • 027.jpg
    027.jpg
    164.4 KB · Views: 664
  • 028.jpg
    028.jpg
    177.4 KB · Views: 670
  • 029.jpg
    029.jpg
    161.8 KB · Views: 709
  • 025.jpg
    025.jpg
    134.7 KB · Views: 726
B

been

Guest
Hey bro... I saw this cab in your intro thread and wanted to ask if they were T5s. I myself have a New Wave so it looks like we both have the same good taste in gear. I went overkill on a 48 though and now I only use 4 lamps and even those are too hot for my liking. If I could go back in time I'd save a bunch of money like that. Those T5s are mighty powerful aren't they?

Nice step by step. I was going to wait until I saw some plants in there before I posted but you gave me rep so now I'm going to sing your praises. :tongueout Hope to see some more pics soon.

thanks bro, and you deserved the bump, lol.

and yeah buddy! ...i love this T5, i was afraid when i bought
it it wouldn't be enough at only 96watts but i'm getting more
new growth than i can use, lol, what a problem!

anyway, here's a few more pics.

btw, that's my son helping me attach the top, not something
i'd have been able to do easily without help.

...and note the chains to prevent the lid from opening too far
and breaking the hinges.
 

Attachments

  • 030.jpg
    030.jpg
    104.9 KB · Views: 646
  • 031.jpg
    031.jpg
    93 KB · Views: 635
  • 033.jpg
    033.jpg
    97.7 KB · Views: 617
here i begin the installation of the exhaust and the electricals.

my plan was to bump the fan a few inchs inside the cab to further
muffle fan noise. (it works too, lol)
 

Attachments

  • 034.jpg
    034.jpg
    122 KB · Views: 620
  • 041.jpg
    041.jpg
    120.4 KB · Views: 548
  • 040.jpg
    040.jpg
    110 KB · Views: 558
  • 039.jpg
    039.jpg
    106.7 KB · Views: 561
  • 037.jpg
    037.jpg
    96.5 KB · Views: 568
  • 036.jpg
    036.jpg
    129.9 KB · Views: 592
  • 035.jpg
    035.jpg
    132.9 KB · Views: 594
...as you can see, my plan was to run all the wiring within the
walls to further enhance the stealthiness.
 

Attachments

  • 045.jpg
    045.jpg
    110.8 KB · Views: 916
  • 044.jpg
    044.jpg
    120.7 KB · Views: 939
  • 046.jpg
    046.jpg
    173.6 KB · Views: 936
  • 041c.jpg
    041c.jpg
    163.4 KB · Views: 1,037
  • 041d.jpg
    041d.jpg
    184.3 KB · Views: 947
  • 042.jpg
    042.jpg
    145 KB · Views: 942
  • 041b.jpg
    041b.jpg
    177.1 KB · Views: 1,002
B

been

Guest
That's slick the way you ran a receptacle to your box. I don't think I've seen anyone else do that...... very tight.
 

Attachments

  • 049.jpg
    049.jpg
    162.9 KB · Views: 849
  • 050.jpg
    050.jpg
    149.6 KB · Views: 825
  • 051.jpg
    051.jpg
    148.5 KB · Views: 803
  • 052.jpg
    052.jpg
    158.8 KB · Views: 784
  • 053.jpg
    053.jpg
    119.3 KB · Views: 766
  • 054.jpg
    054.jpg
    167.1 KB · Views: 763
...before i forget, here are a few of the light and the light leak, lol.

btw, note that there are 2 outlets and 1 switch, i included a switch
to control one of the outlets so i could turn off the light and the
exhaust fan while i was working inside the cab.
 

Attachments

  • 055.jpg
    055.jpg
    85.8 KB · Views: 715
  • 056.jpg
    056.jpg
    128.2 KB · Views: 685
  • 048.jpg
    048.jpg
    140.7 KB · Views: 708
  • 047.jpg
    047.jpg
    134.5 KB · Views: 734
...and here is a CFL cleat i installed to give myself light while
i was working inside the cab, lol.
 

Attachments

  • 057.jpg
    057.jpg
    128.6 KB · Views: 671
  • 057b.jpg
    057b.jpg
    164.9 KB · Views: 650
  • 057c.jpg
    057c.jpg
    161.5 KB · Views: 653
  • 057d.jpg
    057d.jpg
    115 KB · Views: 655
here we have the installation of the intakes, 3x 4 inch louvers
i got at Lowes.

note the hole for the exhaust.
 

Attachments

  • 062.jpg
    062.jpg
    175.4 KB · Views: 564
  • 061.jpg
    061.jpg
    150.5 KB · Views: 590
  • 060.jpg
    060.jpg
    144.9 KB · Views: 604
  • 058.jpg
    058.jpg
    114.1 KB · Views: 624
  • 59.jpg
    59.jpg
    186.5 KB · Views: 631
...and a couple from the inside, plus the installation of the
4.5 inch axial fan i'm using for exhaust.

btw, i installed the intakes high enough from the bottom of
the cab so the air being sucked in enters at the base of my
moms, i wanted to ensure a steady flow of fresh air where
it would be needed most.

note also that the fan is mounted a little cocked, that's because
if i'd mounted it squarely, the screws would have entered the
wood right at the seams where the exhaust box comes
together so i figured mounting into solid wood was more
important than symmetry.
 

Attachments

  • 064.jpg
    064.jpg
    101.1 KB · Views: 553
  • 065.jpg
    065.jpg
    89 KB · Views: 541
  • 069.jpg
    069.jpg
    129.7 KB · Views: 525
  • 070.jpg
    070.jpg
    225.1 KB · Views: 528
  • 071.jpg
    071.jpg
    132.2 KB · Views: 526
...here you can see the back fully assembled, ...as you can see
my fabric solution doesn't entirely light-proof the cab but it is good
enough for my situation, if i'd needed total light-proofing, i'd have
probably used a darkroom louver.

btw, that black fabric is the stuff you put in your garden to
prevent weeds, ...and although it doesn't make the cab totally
light-proof, it does serve to filter my intakes, lol.
 

Attachments

  • 066.jpg
    066.jpg
    158.2 KB · Views: 492
  • 068.jpg
    068.jpg
    125.1 KB · Views: 465
  • 067a.jpg
    067a.jpg
    116 KB · Views: 478
  • 067.jpg
    067.jpg
    102.1 KB · Views: 477
  • 072.jpg
    072.jpg
    129.2 KB · Views: 494
  • 073.jpg
    073.jpg
    122.5 KB · Views: 525
...and now we have plants, lol. ...note the addition of the
2 pc fans for circulation, i'd always planned for them, i just
had to find a 12volt transformer, lol.

anyway, in the first shot you see 2 empty bins, the large one
to the left holds 15x 2liter coke bottles (which just happens
to be what i keep my moms in, lol) and the smaller bin holds 6
2liter bottles.

my plan is to have 15 moms and use the smaller bin for rooted
and vegging clones just waiting to blossom for me.

keep in mind also that these plants look as sickly as they do
because they spent 4 days taped up inside box's while i moved,
and then 2 weeks in my bedroom closet under 3 measly little
CFL's, and with no fan for air circulation, while i finished building
the mother cabinet.

i'm grateful mj is such a hardy plant!
 

Attachments

  • 074.jpg
    074.jpg
    75.1 KB · Views: 508
  • 075.jpg
    075.jpg
    104.4 KB · Views: 489
  • 076.jpg
    076.jpg
    151.6 KB · Views: 489
  • 077.jpg
    077.jpg
    142 KB · Views: 477
  • 078.jpg
    078.jpg
    182.8 KB · Views: 469
Page 1 of 3 · Replies 1–20 of 41
Back
Top Bottom