O
OGMostly
- Posts
- 7
- Joined
- Nov 9, 2011
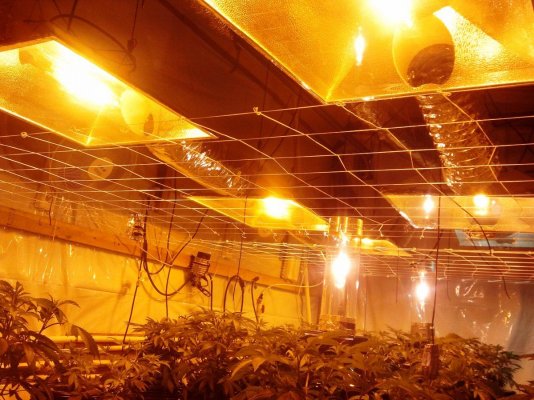
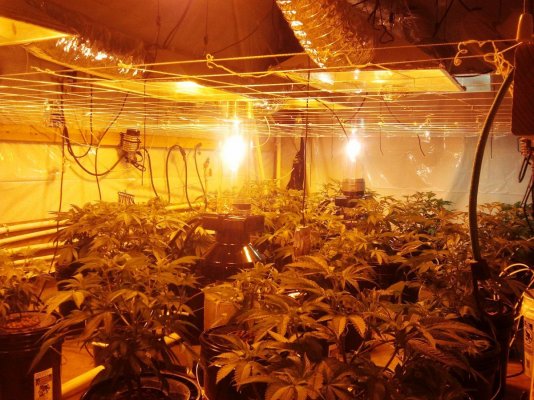
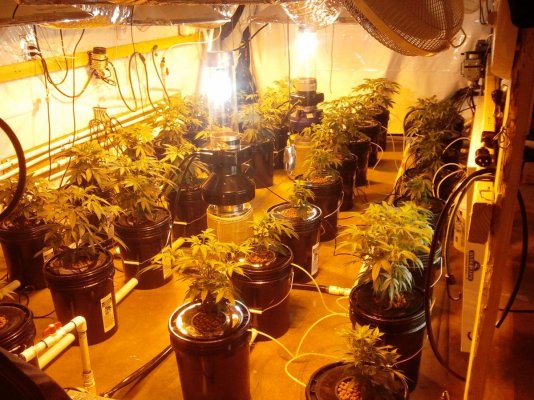
Getting the new grow going. Just built a new UC with 5 gallon black buckets using 5 in. net pots. I used 1 1/4 PVC for this project with the General Hydroponics uniseals "1 13/16 Hole Saw From Grainger" that come as replacement parts for the aeroflo 2. I got them at aroun 1.65 a piece. Since I am doing Bubba this round I wanted to add a few more buckets then I usually run with the OG "24". I am also using a General Hydroponics TNC pump, These things are bulletproof and are extremely efficient.
Grow:
6 x 1k Lumatek - Magnum - Hortilux Super HPS - Combos
2 x 8 in MaxFans placed before and after the Y's that feed the lights
2 x 1 Ton Dual Hose Portable Air Conditioners "Fed cold air with a Vortex to increase cooling"
2 x 400 watt Lumatek Vertical Lights - Water Cooled "Can 33, 6 in fan, Icebox 6, CoolTube"
65 Pint Dehumidifier
Sentinal CHHC4 Controller
2 x 70 liter Active Aqua air pumps with 16 buckets on each
GH 20 liter air pump on 27 gallon epicenter
4 x rows of 8 buckets staggered.
4 x Wall Mount 16 in Fans
1 HP Eco Plus Chiller
Stainless Steel 3/8 in. Coil 25 ft.
Nutrients:
Going All Advanced Nutrients
1. Advanced Nutrients connoisseur A n B
2. B52
3. Bud Candy
4. Rhino Skin
5. Voodoo Juice
6. Nirvana
7. Kushie Kush
8. Big Bud
9. Cal Mag Bloom
10. Synsi Zym
11. Bud Factor X
12. Overdrive
13. Final Flush
Spin that shit :mad0233:
Attachments
-
 diy-undercurrent-32x5-gal-7000-watt-watercooled-vertical-lights-2.jpg118.2 KB · Views: 309
 -
 diy-undercurrent-32x5-gal-7000-watt-watercooled-vertical-lights-3.jpg190.7 KB · Views: 314
 -
 diy-undercurrent-32x5-gal-7000-watt-watercooled-vertical-lights-4.jpg226.2 KB · Views: 339
 -
 diy-undercurrent-32x5-gal-7000-watt-watercooled-vertical-lights-5.jpg154.3 KB · Views: 286
 -
 diy-undercurrent-32x5-gal-7000-watt-watercooled-vertical-lights.jpg210.3 KB · Views: 323
 -
 diy-undercurrent-32x5-gal-7000-watt-watercooled-vertical-lights-6.jpg134 KB · Views: 274
 -
 diy-undercurrent-32x5-gal-7000-watt-watercooled-vertical-lights-7.jpg139.1 KB · Views: 292
 -
 diy-undercurrent-32x5-gal-7000-watt-watercooled-vertical-lights-9.jpg226.2 KB · Views: 278
 -
 diy-undercurrent-32x5-gal-7000-watt-watercooled-vertical-lights-8.jpg152 KB · Views: 273