Very nice work. Don't suppose you could show more pics and info of the greenhouse itself could ya? I would be curious to see more of how you did the climate control, ventilation, etc.
Well I live up in nor ca right about the snow line under South Lake Tahoe so I have lots of tall pines and struggle to get 6 hours of full sun a day. My greenhouse is on the side of a hill and I never planned for it to be a greenhouse. I originally just built two long raised beds on the hillside. It has evolved now into my greenhouse over the course of like 3 or 4 summers. I actually put up the walls and roof on it around a fully budding garden the first year and yes its just corrugated plastic from home depot. Just cemented in some posts connected them across with a few 2x4's and plastic to that frame. Sounds easy enough but was quite the project since it was not built on level ground either way but with the help of grumpy old man we had a roof by mid September. I don't remember exactly what the dimensions are and its about to snow out there or I would go measure for you but its roughly 15'x20' 15 going down the hill and 20 long (down another slight hill). As for the height it just depends on where your standing. The walls don't go all the way to the ground and its pretty jagged but I tried to make them around six inches off the ground all the way around to allow for a little air flow but sunk some wire fence into the ground and attached it to all the posts all the way around to keep out any critters. Should have used smaller fence holes like chicken wire cause I have a lot of lizards that cruise around in there. I used a couple large fans with louvers one at the top and one on the opposite end that kicked on when it got to be about 70 degrees. Also had 4 inline 8" fans that went along the ridge with a little duct to vent out the hot air. They also kicked on around 70 degrees. Inside i also had 4 reciprocating fans to keep the air moving. It gets really hot in there during the summer I've seen it reach 120 degrees in there so I also put in foggers to keep the temp down but after my buds get so big I turn them off scared of mold and rot. I also have at one point put black white plastic along the walls due to the fact that when the sun hit a certain point in the evening all you could see from the outside was this silhouette of giant buds. A friend gave me a large swamp cooler which I have blowing in at the top on a y with a long piece of 10" duct running along the wall down to the bottom. When I got that is when I put in some lights. I dropped some medal halides vertically down in like 4 spots. I also had an led fixture that I was not using so I hung it in there as well. Due to the extra heat they put off I had them come on for few hours in the morning and few hours in the evening. I try to keep the temp in there below 90 degrees or at least don't add heat with lights when its over 90 degrees. During the peak of summer it does get over 90 degrees in there for multiple days and there's not a lot I can do but keep em hydrated. I get a lot of stretch with the high temps so I end up buds to the roof sometimes.:eek: I'm not sure if I answered your question or not I actually wrote this in response to a message someone else left me with the same sort of question. I don't know if I have any pictures that really show the set up. Here are a some that kinda give you an idea I hope

The fan in the background here I had 2 of them one near top and one near top of the bottom if that makes sense.
These are early in the year before cooler and lights and give you an idea of the layout. Also they were in
smart pots on top of soil some of the
smart pots had holes cut in the bottom so the roots were free to go through. The soil was I thing its called Flower Power (which I dont think is around anymore) with lots of worm castings.
Ok this one if you look at the top of the pic in the middle you can kinda see where the big fan with louvers is but shortly after this point is when we put in the cooler right in the spot and moved the fan to the opposite side in the roof.
These are the inline fans along the ridge you can also see here that we ended up black white plasticing the walls.
Here is the top corner after the cooler was in we put a y with 10" might even of been 12" duct one short piece to blow into the top and a long piece ran along the wall all the way to bottom.
Here is a pic of the duct running down the wall and with our new found cool air it was on and crackin, you can also see the metal halide dangling there.
I have no clue what this pic was supposed to show
Here is another of the light also you can see the ballasts are just connected to to the post and if you look real close at the top you can see the foggers which definitely are not being used at this point but they did help a lot in the earlier stages.
This one you can kinda see the burner the green thing on the top right and the white thing on the left is a led fixture.
Here is a better angle with the LED, Burner, and Ballasts
I hope that helped and to be perfectly honest all of that was done in an attempt to control temperature and give nice bright light. It did get over 120 degrees in the peak of summer for multiple days the MH lights only were added after foggers went off for the season and they only came on for a few hours in the morning and a few hours in the evening to try and capture the same six hours of full sun that a nice south facing property with less trees would get naturally.

 a-grateful-greenhouse.jpg65.6 KB · Views: 306
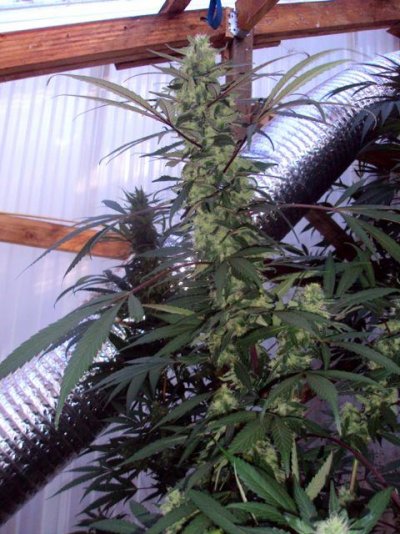 a-grateful-greenhouse-2.jpg69.5 KB · Views: 289
 a-grateful-greenhouse-3.jpg67.5 KB · Views: 289
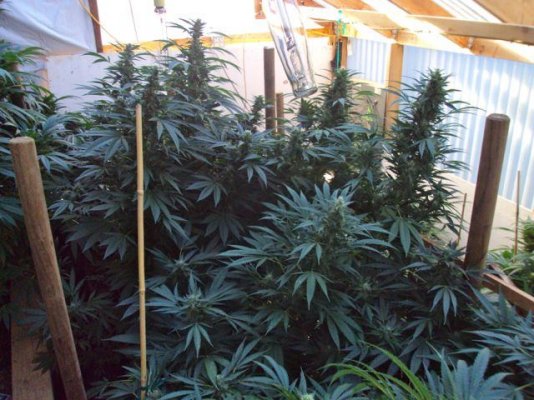 a-grateful-greenhouse-4.jpg69 KB · Views: 293
 a-grateful-greenhouse-5.jpg55.4 KB · Views: 289
 a-grateful-greenhouse-6.jpg60.5 KB · Views: 283
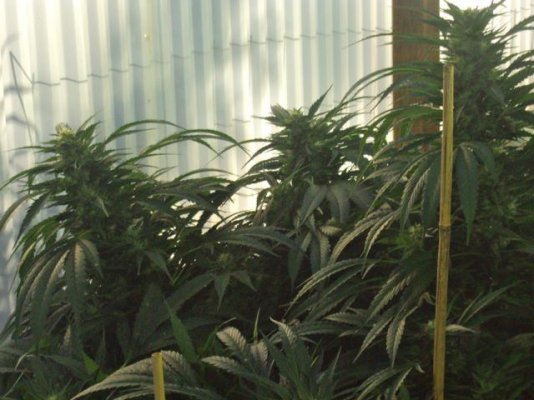 a-grateful-greenhouse-7.jpg51.6 KB · Views: 283
 a-grateful-greenhouse-8.jpg67.2 KB · Views: 284
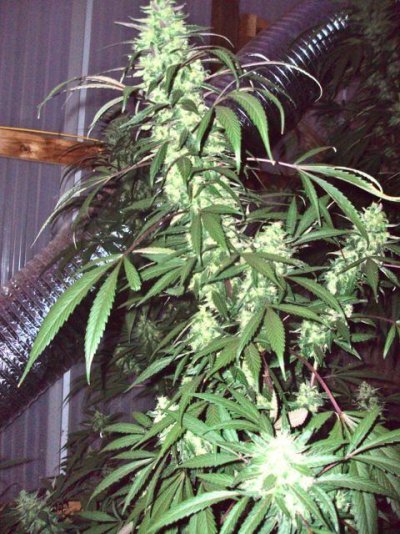 a-grateful-greenhouse-9.jpg83.3 KB · Views: 284
 a-grateful-greenhouse-10.jpg63.8 KB · Views: 285
 a-grateful-greenhouse-11.jpg74.5 KB · Views: 283
 a-grateful-greenhouse-12.jpg62.2 KB · Views: 281
 a-grateful-greenhouse-13.jpg51.9 KB · Views: 278
 a-grateful-greenhouse-14.jpg53 KB · Views: 280
 a-grateful-greenhouse-15.jpg73.5 KB · Views: 283
 a-grateful-greenhouse-16.jpg67.4 KB · Views: 280
 a-grateful-greenhouse-17.jpg74.1 KB · Views: 281
 a-grateful-greenhouse-18.jpg80 KB · Views: 287
 a-grateful-greenhouse-19.jpg69.7 KB · Views: 288
 a-grateful-greenhouse-20.jpg83.7 KB · Views: 286