Log In Register

Backyard - Northern Skunk x Kush Berry

I started seeds indoors around the middle of March 2026 under LED lighting. Genetics have the following story: Started with seeds from PeakSeedsBC (a now defunct breeder who went the 'legal' route in Canada and no longer sells to the public) In...
Home › Forums › Medical Cannabis Cultivation › Grow Diaries › Backyard - Northern Skunk x Kush Berry
Grow diary · Active · Medical Cannabis Cultivation

Backyard - Northern Skunk x Kush Berry

by applicanon · Started · Day 120 of an ongoing grow
120d
Running
1
Updates
10
Replies
12
Images
01The progress log

Structured updates from the grower

Most recent first
Diary day
1
Week 16 - Veg

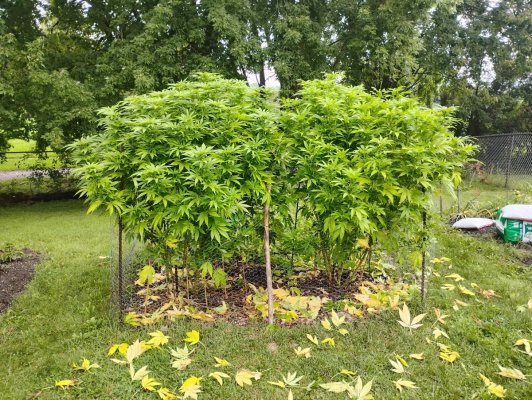
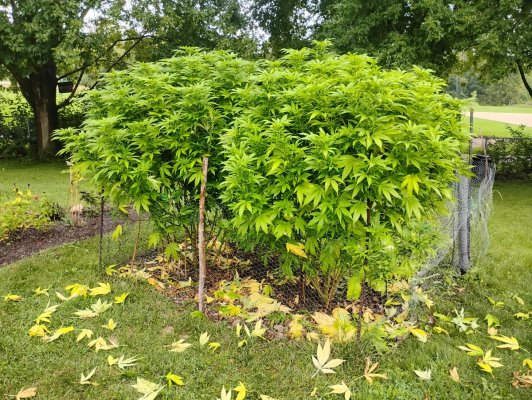
Here's pictures of the grow up to today's date. As you can tell, the plants had gotten root bound and had completely outgrown their indoor grow space. This is why they look so pale and worse for ware in the initial pictures. You can tell that...

12 images · Post #2 · Jump to post →
Day
120
Awaiting
Next update pending

The grower has not posted a structured update in 119 days. Regular replies below still count toward discussion, and a new structured update can be added at any time.

Backyard - Northern Skunk x Kush Berry
Active Photoperiod

Grow details

Strain name
Northern lights x skunk x kush x blueberry
Started
Recent activity
Environment
Outdoor · Living Soil
Current stage
Veg - Week 16
Discussion below · 10 replies
Page 1 of 1 · Replies 1–11 of 11
1
A

applicanon

Posts
12
Reactions
26
Joined
Jun 23, 2026
Points
13
I started seeds indoors around the middle of March 2026 under LED lighting.

Genetics have the following story:
Started with seeds from PeakSeedsBC (a now defunct breeder who went the 'legal' route in Canada and no longer sells to the public)
In 2024, I crossed a peakseedsbc Northern lights X skunk female with a peakseedsbc Kush x blueberry male. This produced a shitload of seeds that I will refer to here on out as NS x KB.

I started a handful of seeds under 24 hour LED lighting around the middle of March, 2026.
Of these I kept the best looking 6 plants as this was all that would fit in my indoor grow area.
By the time the weather was warm enough to put the plants outside, they had matured far enough
to show their sex without messing around with the lighting. 4 were male, 2 were female.

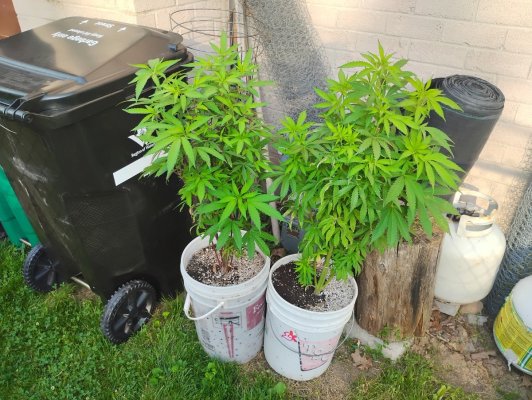
I plan on keeping 1 of the males around the side of the yard in a bucket so that I can selectively pollinate some of the female buds in order to get a hundred or so seeds, without completely overwhelming the entire grow with seeds. I'm not sure if pollen can be stored, but I'm going to try and save some of the pollen and see if it can be used to pollinate future females. It would be nice to be able to back cross future progeny of this genetic line without having to grow out seed stock each and every year.

I planted the 2 females directly into the soil of my backyard vegetable garden.
Prior to transplanting them, the garden bed soil was prepared. I dug down approximately 2.5 feet deep in a 3 foot x 6 foot area.
I replaced the soil with a premium soil mix which was comprised of the following:

Approximately:
2 Parts promix HP or promix BX
1 Part Perlite
1 Part Vermiculite
1 Part Worm castings

This soil mix was amended with the following dry mix of fertilizers:
4 tbsp Hen manure pellets (5-3-2)
4 tbsp Dolomitic limestone
2 tbsp soft rock phosphate
2 tbsp azomite
2 tbsp humic acid mini granules
1 tbsp crustacean meal (4-2-13)
2 tbsp Therm x 15m soil conditioner
4 tbsp kelp meal
1 cup biochar

This mix of dry amendments makes up a total of approximately 400ml which was thoroughly mixed into the entire bed area which I had dug out and back filled with the premium soil mix.

This was probably on the weak side when it came to the dry amendments as the amount of soil mix that it ended up taking to back fill the hole that I dug was quite large, but I wanted to use precaution rather than use too much and be sorry. After all, if it turned out to be too weak, there is always the option of supplementing with liquid fertilizer throughout the grow, but if the mix was too hot, there's basically no going back without a tremendous amount of headache.

Oh and just an added note:
The bed has been mulched with dried oak leaves.
 
Last edited:
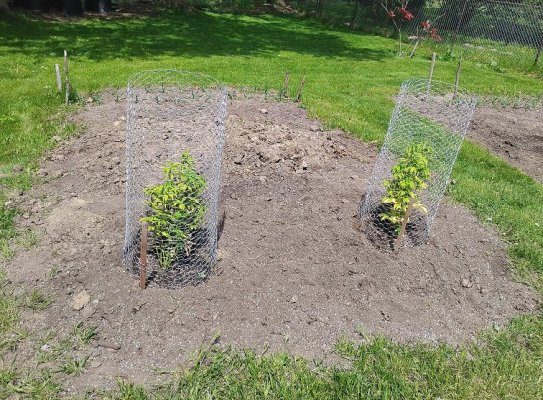
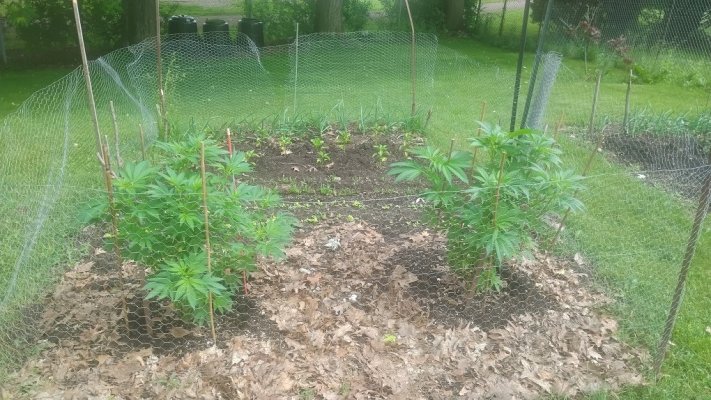
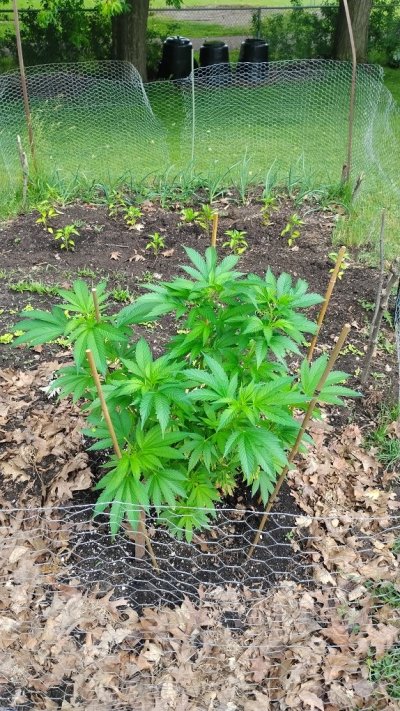
Here's pictures of the grow up to today's date. As you can tell, the plants had gotten root bound and had completely outgrown their indoor grow space. This is why they look so pale and worse for ware in the initial pictures. You can tell that all they needed was some new space to stretch out their roots and find fresh nutrients, and they completely recovered and spewed forth beautiful green growth thereafter. :)

The hole in the ground:
1
first day after transplanting:
2
34
About 2 weeks after transplanting you can see the plant has gotten used to (and is loving) it's new home and soil mix as it was rootbound and hungry prior to transplanting:
56
7
89
1011
Most recent picture taken yesterday, June 22, 2026:
12
 
Just a little update.

I noticed on one of the male plants and on one of the big female plants a single branch on each of them had what I believe to be a genetic mutation. These branches had developed very flat instead of the usual round / boxy shape they should be. This had caused these branches to actually go limp and not be able to support themselves.
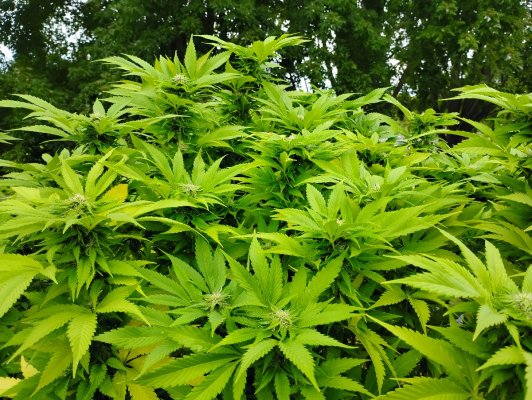
Because of this, the male plant in question was completely eliminated as to not pass its DNA to the future genetic line.
The female plant with the mutation will be kept for the bud, but I will not be pollinating it. I removed the offending branch. At this point in time, those were the only 2 branches where this had developed. I hope it does not show up on any of the other plants. It very well could because they are all from the same batch of seeds from the same mother.

Here's some pictures of the 2 big girls. They really are pumping out a massive amount of new growth each day. I'm really impressed. I fed them a VERY weak solution of worm casting tea which also had kelp meal, molasses, hen manure, biochar, azomite, humic acid, fish emulsions, hydrolyzed fish, and neptunes harvest seaweed fertilizer.

June28 2026 01

June28 2026 02

June28 2026 03


The 2 remaining males were chopped down to size today. I removed the upper 2 feet of growth to keep these plants a little more manageable in their 5 gallon buckets. If I had let them continue to get bigger and bigger then I would have had to water them every single day and this would get very bothersome. They will produce more than enough pollen at a much smaller size, and will require much less water this size as well.

June28 2026 04


I am considering moving the males into my garage at night everyday and bringing them back outside in the morning in order to force the males to start flowering early. This way I can get the pollen collection out of the way and not have to deal with them for very much longer. I'll probably start doing this tonight. My plan is to only pollinate a small portion of the female flowers in order to produce roughly 200 or so seeds, leaving the rest of the plant sensimilla. If I can get the pollen relatively early on then I can pollinate the pistils that develop in the first week or two of flowering, and all the flowers that develop afterwards will not be pollinated at all. Hopefully this will result in a small number of seeds, as well as making all the pollinated flowers develop into fully mature seeds without ending up with a bunch of underdeveloped wasted seeds, as this happens a lot if you leave the males with the females the entire flowering season. Anyways thats all for now.
 
Picture taken July1_2026, Canada day

Fed july 4, 20206 with:
Top dressed 1 Tbsp per plant slow release hen manure 5-3-2
Fed very weak worm casting tea
July1 2026
 
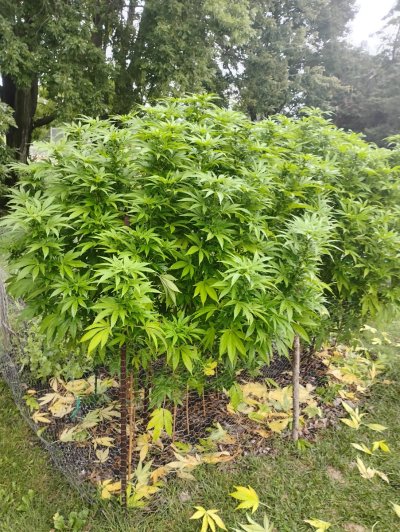
I did a lot of manicuring this morning on the lower quarter of the two big females. Removed all the sucker growth and foliage to help with air circulation and to force growth towards more productive budding sites. The plant on the left seems to have a better branching structure than the one on the right, although they are both very similar. Both have fairly large node spacing. I'm not sure if this is due to genetics, the superb health and fast growth of these girls, or both. I recall having very healthy plants like this in the past that had much tighter node spacing, so I'm inclined to think it's mostly a genetic thing.
I am feeding them a very watered down nutrient solution comprised of a tea made from a mixture of organic nutrients (worm castings, kelp meal, hydrolyzed fish, hen manure, molasses). I am very scared of over fertilizing them so I aim to make the strength of the tea about 1/4 of the recommended strength that it says on the bottles of the hydrolyzed fish and the liquid kelp fertilizers that are in the tea, and then I add an equal amount of water again so that in theory it's like 1/8 the strength. I'm feeding with it everyday except for days where it rains and they don't need water. The soil mix seems to be doing very very well. Even with watering daily they never seem to be over watered. I'm watering with approximately 1.5 gallons per plant, and the soil surface seems to be ready for more water each day. If they were being over watered I would expect to see the leaves sagging downward. It's kind of a similar effect to when the plants are drying out and are in need of water. Each morning before I water the leaves are sprung slightly upward which is a sign of optimal health, the plants reaching toward the morning sun ready to grow, so unless I see signs that say otherwise I think I'll continue with this watering schedule.

I should add that I don't water every single morning, especially if it rained heavy the day before, or if it's exceptionally overcast and the temperature is around 22 deg. C all day. We had a heat wave a couple weeks ago with temperatures reaching above 35 deg. C for about 4 days in a row and I watered more than usual on these days. I was very impressed with the performance of these plants in such weather as they weren't adversely affected whatsoever, whereas my lettuce and tomato plants wilted quite badly, even with watering multiple times throughout the day to try and keep them cooled off and hydrated as much as possible.
 
Here's some photos I took this morning!
Biggirlssmaller1
 

Attachments

  • biggirlssmall2.jpg
    biggirlssmall2.jpg
    404.5 KB · Views: 3
  • malessmall.jpg
    malessmall.jpg
    324.4 KB · Views: 3
aug 31 update. PH of my backyard hose has been 7.5 and i've been feeding with it unadjusted all summer. unfortunately by the time I realized the ph had gotten off it was too late to correct.
 

Attachments

  • 1000003200.jpg
    1000003200.jpg
    504.8 KB · Views: 3
  • 1000003201.jpg
    1000003201.jpg
    528.2 KB · Views: 3
  • 1000003205.jpg
    1000003205.jpg
    240.6 KB · Views: 3
  • 1000003207.jpg
    1000003207.jpg
    278.7 KB · Views: 3
  • IMG_20260831_153247872_HDR.jpg
    IMG_20260831_153247872_HDR.jpg
    412.6 KB · Views: 3
aug 31 update. PH of my backyard hose has been 7.5 and i've been feeding with it unadjusted all summer. unfortunately by the time I realized the ph had gotten off it was too late to correct.
They look great man, they don’t seem to mind the water ph.
 
They look great man, they don’t seem to mind the water ph.
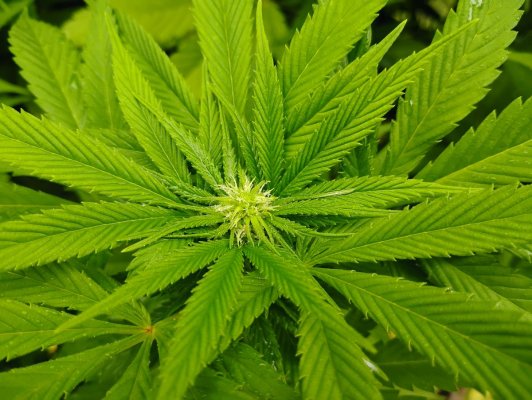
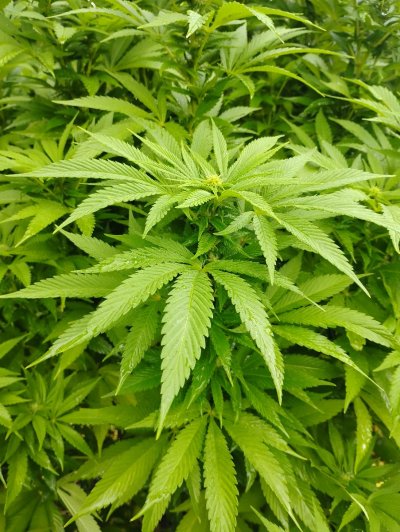
The pictures don't really show it too well but there most definitely is a PH issue with these plants. They've got that entire plant lime green going on and it kicked in around the middle of July. Up until that point they were a very rich green and the growth was vigorous. Once they started to be affected by the PH issue the growth really slowed down significantly. They went from gaining 3 or 4 inches every day or two to taking about a week to grow the same amount.

When the issue initially started, I didn't have a working PH meter, so I assumed the PH was likely on the low side, so I top dressed with a few tablespoons of dolomitic lime, along with top dressing some hen manure pellets and kelp meal because I thought the issue might have been due to the plants using up all the nutrients from the worm castings. Obviously this didn't correct the problem and it only seemed to get worse as time went on.

I broke down and bought a new PH meter for testing when I water, as well as a soil PH meter to check out what it would say my soil PH is at. I've never really trusted soil PH meters before, but the one I bought is a digital one and it seems to be trustworthy for the most part.

After checking the hose water that I had been watering with and seeing that it was 7.5 and measuring the soil PH around the base of the big females and getting readings between 7.4 and 8.0, I was fairly confident that the issue I've been having is a PH that's too high. Unfortunately I held off on purchasing the PH equipment until I think July 21 or something like that, and it was far too late in the season to really do anything about it, other than making sure everytime I water from then on out to correct the water to PH 5.5. I also top dressed a couple tablespoons of elemental sulfur at the base of the big females, even though it will take far too long for the sulfur to take effect, I figured it couldn't hurt. I also top dressed a couple tablespoons of iron sulfate which should lower the PH a bit quicker than the sulfur, but I didn't really want to be too aggressive with it since I've never used iron sulfate before and didn't want to completely fry the girls with it.

Anyway.. After the harvest, I have a couple bales of peatmoss that I intend on mixing into the garden bed to try and correct things for next spring. I think the biggest thing is knowing that I've got tap water that's a bit on the high PH side so I need to be cautious with the amendments I add to the soil before planting, and try to avoid anything that raises PH.
You mentioned too that you were feeding lightly, maybe a combination or even just the lack of available nutes? Either way, they look good enough to make it to the finish line!
 
Just a quick update!
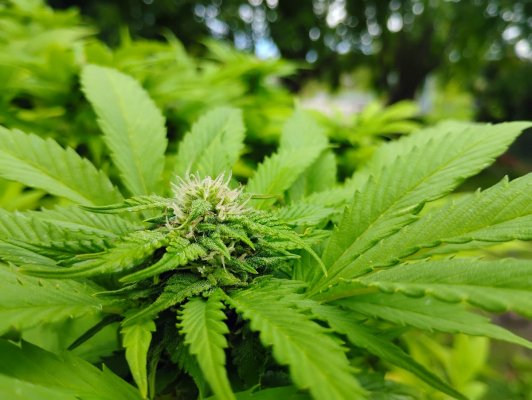
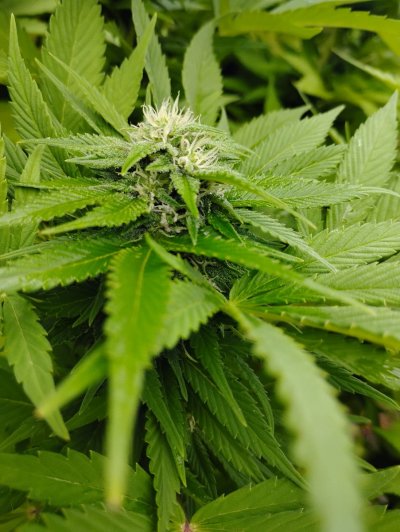
Things are looking surprisingly a lot better than I thought they would at this point in the grow. Because of the PH issues I thought flowering wasn't going to be that great, but if you take a look at the photos you can see that things are progressing along just fine.

I did an extensive amount of pruning of the lower growth. I removed everything below half way up the plants so that the uppermost bud sites would get all the energy. In addition to that, every couple of days I'm removing any yellowing leaves because if I leave them on the plant, as they fall off naturally, they can fall onto lower bud sites and begin to mold or grow powdery mildew etc. which we all know is a death sentence once it starts. So yea I'm doing my best to keep on top of that. Target harvest time is somewhere between October 5 - October 15 depending on how things go!

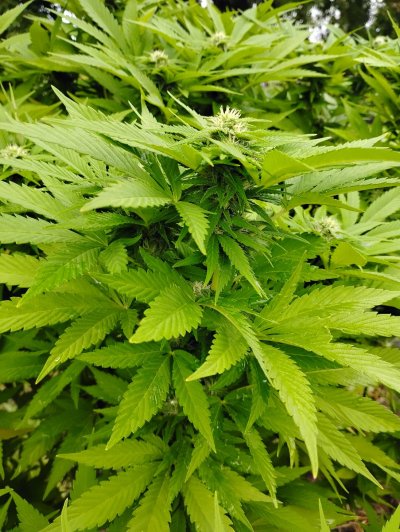
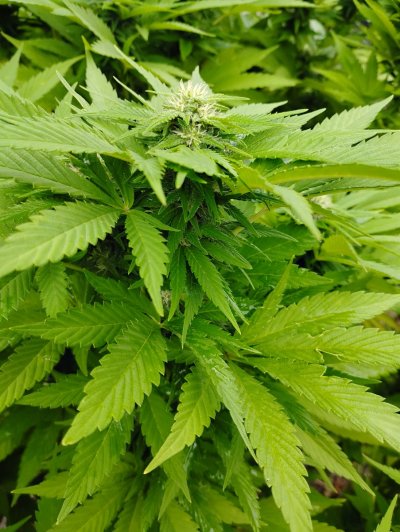
The smell is great and the trichrome production is great too. Some of the pistils are pink which is a trait that comes from the blueberry lineage. There seems to be a perfect amount of calyxes which contain seeds. I didn't want things to be overwhelmed with seed as I still wanted some smoke-able bud, so I pollinated early on and got rid of the males so that only the first of the pistils would be pollinated, and it seems to have worked. Looks like I'll probably have around 100 or 200 seeds which is just about the number that I was aiming for.
 

Attachments

  • 1000003476.jpg
    1000003476.jpg
    295.4 KB · Views: 2
  • 1000003477.jpg
    1000003477.jpg
    250.7 KB · Views: 2
  • 1000003480.jpg
    1000003480.jpg
    385.1 KB · Views: 3
  • 1000003481.jpg
    1000003481.jpg
    187.7 KB · Views: 3
  • IMG_20260915_105516888_MP.jpg
    IMG_20260915_105516888_MP.jpg
    215.2 KB · Views: 3
Page 1 of 1 · Replies 1–11 of 11
1
Back
Top Bottom