Building a 4x6 hidden room

  • Thread starter budderfly
  • Start date
  • Tagged users None
ShivaSkunkPunk

ShivaSkunkPunk

830
113
Appreciate the detail'd work, Top Flight **** here my man, look'n forward to the build out culmination and grow show to begin, Peace SSP
 
budderfly

budderfly

38
18
Ok folks, so I don't have a ton of progress to show you yet. I've gotten some odds and ends done: Finished the door by green gluing on a second sheet of drywall and adding some furniture sliders to the bottom. In between the drywall I sandwiched a 6" x 18" x 1/8" steel plate for possible use as a magnetic handle to help maneuver the door. I painted the backside of the fake wall to help protect it from dings from the door. Put pink foam XPS insulation adjacent the back of the fake wall, trying to keep any heat signature down (foam is going above the ceiling too).

Anyways, I did finish off one part..

Roxul meme


Lots of roxul 1


Lots of roxul 2


Lots of roxul 3


Lots of roxul 4


I stuffed every nook and cranny I could find with Roxul. The stuff is great! The room is so quiet inside. In between the joists I even put 3 layers (9" deep). I bought 4 packs of the stuff and I couldn't use it all, but I sure as hell tried.

That's it for now. Tomorrow I have a family thing all day, and then Monday I start back at a real day job, 9-5'ing it, salary. It's a good thing. Financial woes were an impetus behind this room and it will be much more chill if I'm not counting on it for the mortgage. This is hopefully the end to what has been a very disappointing year for my wife and I. Please send us good vibes we could use a couple wins here.

Hopefully I'll be wrapping this room up with the wiring by next weekend. Left to do is putting up the OSB, then 2 layers of drywall with green glue, mud, prime, paint, floor liner, electric, equipment, turn it on.
 
stutter

stutter

325
93
can't wait to see the finished product. just found this thread and read it start to finish looks good.
I'm in a non legal country and buying a house very shortly. i will be looking to make a small section disappear in a similar fashion.

i like your idea of the magnets for handles i was going to suggest that to you myself but you stole my glory by coming up with it yourself lol
 
budderfly

budderfly

38
18
Updates are less frequent now because I'm back to working in my office full time Mon-Fri. Haven't gotten as far on the the room as I'd hoped, but that's ok. If I meet my deadline on my first project I'll be getting an 50% raise; can't argue with that.

Okay. I picked up like 7 tubes of this acoustical sealant caulking, also made by Green Glue (though others sell it as well).

Sealant


Around the entire perimeter I laid a thick bead along the base plates to seal those up, and also a bead up one of the corners that had some gap.

Sealed perimeter


I also plan to use the sealant in the cracks of the inner drywall layer, and also around ventilation ports, to try and make the room nearly completely sealed.


Today I hauled in a bunch of drywall. Wonder what the neighbors are thinking, I'm sure some have been watching me unload 4x8's.

This purple drywall is for the inner layer. It is high impact resistant, mold resistant, Type X (fire rated) 5/8". It is heavy as f*ck. Considerably heavier than a standard 5/8" Type X sheet.

Purple board


I'm using standard Type X 5/8" as the inner layer because it won't need impact or mold resistance and it's less than half the cost of the purple stuff. Also, the two different density materials might provide better sound proofing characteristics as each density has different resonant frequencies and absorption characteristics.

At this point I am more concerned about screws holding all the weight than I am about sound leaking out. There are only a couple of more techniques that could be used - floating floor, full cover of mass loaded vinyl or lead, and maybe resilient channels (but I wasn't sure they'd handle the weight), or more double walls. All of those seemed prohibitively expensive.

But with all that mass (it's alot), and green glue and the whole room wrapped in roxul - it may be so quiet inside as to induce hallucinations!


I've been cutting lots of OSB sheets, so I thought I'd show you guys the track system and from Eurekazone that I use.

What's so great about this track system is that if you can draw a line, or even mark two points, then you can make a perfect cut on that line. So that's the first thing I do, mark my cut. Some of the walls already in place were not square, this let's me cut on any angle and I can make panels fit unsquare corners with consistent spacing all around.

So I mark my cut.

Measure mark


Then here's the bottom of the track. This clamps the rail onto the board.


Track clamp


Everything in this system is so well designed. There's a spring on one end of the clamp so that it's under tension and resists moving and coming out the end, but still slides smoothly. The owner of Eurekazone is some Greek-American carpenter who has a lot of opinions on how to do safe, productive wood working and he designs and builds all his tools. I have the 118" track saw combo with clamp extensions you can cut pieces under an inch thick. I have a miter/square that can connect to the track, as well as repeater stops for cutting many pieces to the exact same length, and finally I have the full kit to attach a router which enables so much awesomeness. Anyone in the market for woodworking tools should check this stuff out.

On the saw I attach a base that rides the rail. The saw's a Makita 5008MGA. Nice saw, dust collection could be better, though.


Track saw base


Your cut is as good as your placement. It's hard to explain how safe cutting this way is. I built furniture in a prison workshop on traditional equipment (table saws, etc), and a circular saw on a good track is so much safer than a table saw and that gives you confidence to operate your equipment. It also let's me have a whole workshop in a lot less space than traditional floor equipment takes - not to mention it doesn't all weigh hundreds of pounds like big shop equip.

Track crosscut 2


Finished cuts are right on the money. The table is also a Eurekazone product. They send you the tracks and mounting hardware. You provide a 2'x4' 3/4" board (it's OSB) and all the 1x slats. The two on each end swivel and it holds a full 4x8 perfectly. The banquet table legs under the board fold up for storage, too.


Track table after cut


When you want to cut down the 8' side of a board you connect the two rails.

Track connect 2


The rails align themselves perfectly every time due to the shape of the channels the connectors are in.


Tracks connect 1


Anyways, towards the front of the room I put in a layer of pink XPS foam over the roxul to help prevent any heat signature from showing through the front wall.


Ceiling 1


The last piece I had to cut for the ceiling was this part with the duct cutouts. It has only one 90 degree corner and four different length sides - 22", 21 13/16", 19 3/4", and 20 1/16" - lol. But I just marked it off going out from the 90 and zipped each egde of with the rail - and it fit perfectly first shot!


Ceiling 2


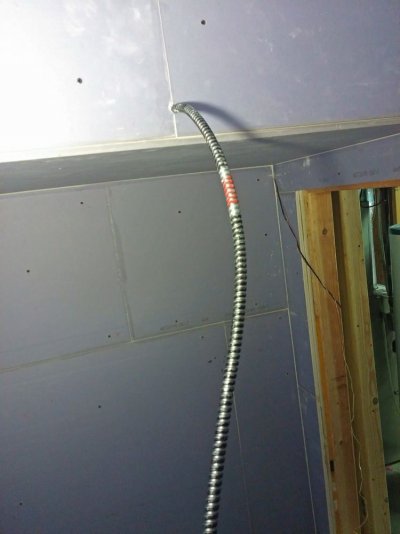
Here's a shot of the soffit covered. I stuffed every crevice with Roxul in there too. Drilled a 9/16" hole for the AC cable, it's a pretty good seal and I've been liberal with that acoustic caulking.


Soffit cable entry


There's more done, but I don't have more pictures yet. Sorry to drag it out so long on everyone but I wanted to do the thread in real time.
 
Track table after cut
socalval

socalval

652
143
Your giving us 1 hell of a building show bud . 25 cents an hour Aint Sh!t but P.I.A will teach you how to work some wood ,priceless . About How much have you invested so far into this ?
 
Aligee

Aligee

3,804
263
Nice and clean pro build bro ive been following your thread on IC ...wishing you the best in your venture!!!
 
budderfly

budderfly

38
18
Your giving us 1 hell of a building show bud . 25 cents an hour Aint Sh!t but P.I.A will teach you how to work some wood ,priceless . About How much have you invested so far into this ?

Ours started at $0.50 an hour and I got as high as $1.50 an hour after a couple years.

I've got close to $3000 into this now. I've been tracking it on a spreadsheet and at the end I will compile everything and post it. This ain't exactly my first rodeo and even I underestimated it by a solid grand.


Nice and clean pro build bro ive been following your thread on IC ...wishing you the best in your venture!!!

Thanks. Few years ago I was an active member both here and there, so when I came back to show this build I went to the sites I knew. Got to say, activity is a lot less than it was then, and I wonder where most people have gone too... but I learned everything I know about growing from IC and the Farm so that's who I decided to share this build with. As you can see I cross-post just about everything, but try to take time to answer individual questions on both threads.
 
budderfly

budderfly

38
18
Ok quick mid-week update. Still plodding along. Didn't get all the pictures I wanted of this step in retrospect, but I'll show you what I've got for finishing off the ventilation in and out of the room. The end result is primo.

So earlier you saw the flex ducts hanging out of a roughly 20" square in the ceiling. I cut a board to fit and traced a 6" & 8" elbow on cutting them out with a jigsaw. Into the elbow I put a duct connector - basically just two crimped ends. The 8" connector was short, but the 6" was long and I couldn't find a short one. It ended up being a bit of an issue as the duct gets a bit cut off in the turn once the board is all the way up in the ceiling. It should be ok but I'm disappointed, that's the perfectionism talking.


Duct board 2


You can also see I sealed around it with acoustic caulking on the backside that goes into the ceiling. Here's the elbows on the room-side of the board. That roll of tape weighs a good few pounds. It's made out of lead!

Duct board 3


I used the lead tape on the room side of the board to seal that side. These two giant holes may be the largest potential sound leak so I'm layering tactics. The space between the joists and around the flex duct got stuffed totally full of roxul to help dampen the ducts. In addition to the insulated wrap and the mass loaded vinyl!


Duct board 4


I'm afraid I forgot to get a picture of the board connected but not screwed in yet. It was a serious pain in the ass and I forgot to stop and take it. I had to cut the flex ducts short so they didn't jam up when the board was all the way up. It was way stuffed in there. Then I had to hold the board like 6" from the ceiling and manuever the ducts over those connectors. In retrospect, I probably should not have taped the connecters to the elbows but instead but the connector on the duct first and then just slip that into the elbow through the board when putting it up. Oh well, it works.


Duct board 5


That pic was right before the last board went up. It's up now, and I've cleaned up all the mess. Now I have to seal all the gaps with more acoustic caulk.

The elbows also still twists, so I can swivel either elbow left to right all the way to adjust for a straighter duct run depending on where the filter, fan, and muffler fit. You could also point the elbow straight down, which may be an option for the intake run.


Duct board 6


I also have the intake filter which looks really nice (from Phresh) and the duct mufflers are both in and they look awesome too - sounds very dead inside them! I also have a couple of backdraft dampers so that if the fans are ever off in the room the central heat/ac won't suck out smelly air. Almost $50 for the pair, but necessary if you're connecting to the house's shared ducting.

Anyways, day job keeping me busy, I should've been in bed two hours ago.
 
newfarmer

newfarmer

57
18
Wow I totally feel like I've been left hanging. How did the final product turn out?? Dying to see!!!!
 
splakdawg

splakdawg

203
43
Yea whatever happened? I was.interested in seeing how u was gonna construct the false wall entrance.
 
reloader

reloader

448
93
Wow, I was like hooked on this thread just read the whole thing, & would love to see how this turned out.
 
DO IT

DO IT

439
93
Maybe the people he was trying to hide his room from where on the farm watching :watching:... Sometimes a secret room is best kept "secret". But a very nice build out as far as we got to see... Budder might have a future in room design and setup ;)
 
budderfly

budderfly

38
18
Hey all, I'm still around, still lurk sometimes. Updates will come, but life's been very busy, and frankly nsa snooping, data sharing all the way down to local leo, and parallel construction to get warrants have me a little weary these days. When I last posted, we weren't even sure we'd be able to stay in the house, but we got things straight with the bank a while back so that's no longer a concern.

I can't wait to share updates with everyone, but you'll have to be patient. Things turned out really well. The sound proofing is seriously on point. It's a little cramped, but it works, and who doesn't want more space, amiright.

The electromagnet lock on the door was a bit of a bust, the way the controller works sucks for this purpose (you have to hold the button down while moving the door, plus the remotes are a horrid color that stands out), and the way I had to mount it wasn't really secure and made the door very hard to move in and out of place, but I have some ideas to address that. I'll have to add another electromagnet to the other side of the door and build a new controller for it.

I won't leave this build out thread unfinished, and my sincere apologies for making everyone wait a year+. You'll have to wait more for the rest of the pics, but they will come. I built it, they will come ;)
 
budderfly

budderfly

38
18
I found some old pics, an update is past due :)

Here's the walls right before painting. If you look by the door opening you can see 3 layers. First is 1/2" OSB, then 5/8" Type X (fire resistant) drywall. The inner layer is 5/8" impact and fire resistant drywall. All the seams are caulked with Gren Glue's acoustic sealant.

Pre painting


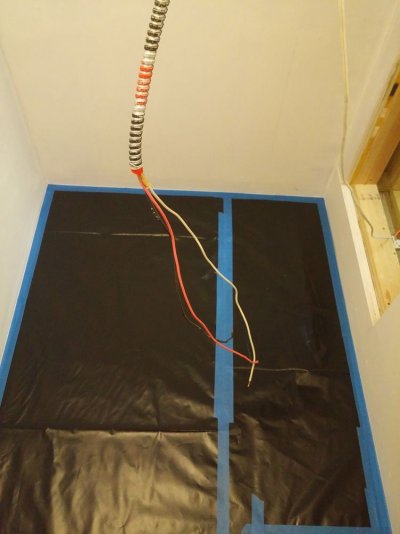
Here is it taped up and getting painted.

Painting


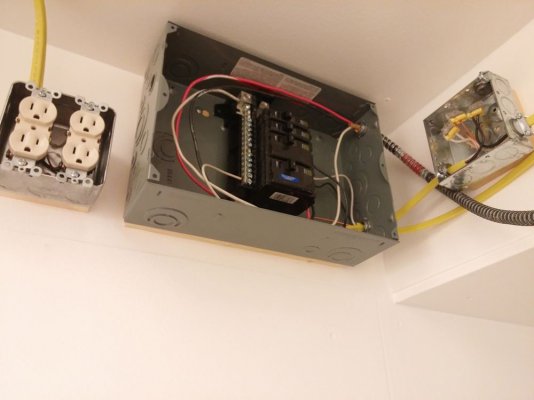
Next is installing the subpanel. Man was I happy to get to the electric. Finally the easy last stretch of putting this room together!

Subpanel


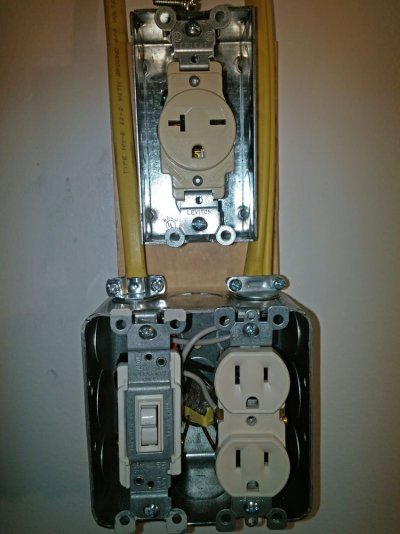
Wiring some outlets. The switch is a double throw so it turns on green led strip lights while at the same time turning off the active intake.

Outlets


have you managed to stop sound from the fans?

Definitely.

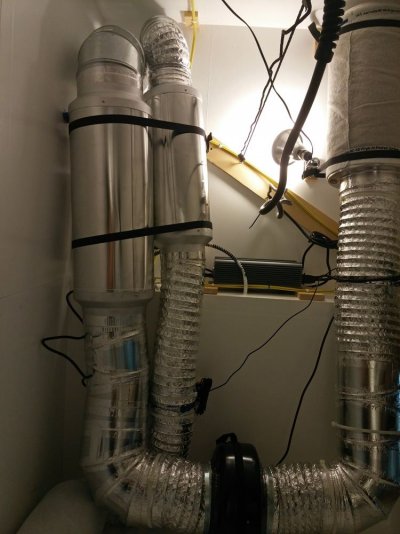
Here's a shot of the ceiling to show the ventilation setup. I did try it without the mufflers but you could hear the fans somewhat clearly in a couple of the upstairs vents. With the mufflers you can't hear anything but a bit of air movement.

I used hard elbows and taped up every seam in the ducting. The active intake helps significantly versus just leaving an open duct.

Ventilation


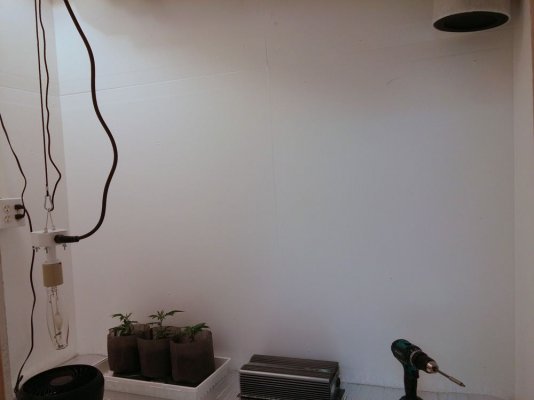
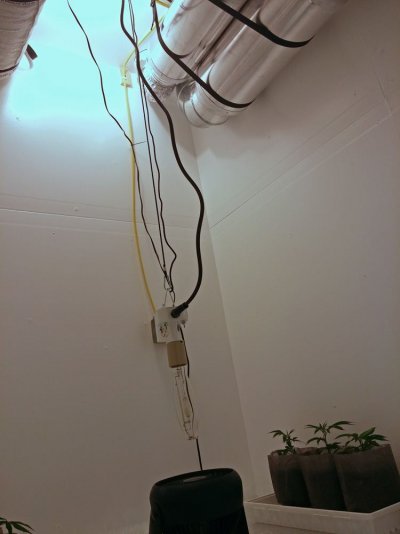
Here's a shot of the room with a few girls vegging in front of a 400w MH. That's the intake filter up in the corner.

Room1


Here's another room shot to give some context with the ventilation.

Room2


I did end up allocating this room entirely to flowering. I had some neat plans to build veg into here but the extra space was too tempting so I stuck veg on the other side of this room under the stairs with a bare 400w hanging.
 
fishwhistle

fishwhistle

4,686
263
Geez,blast from the past!I remember this thread budderfly,im surprised it made it,alot were lost in the site changeover.
 
budderfly

budderfly

38
18
Geez,blast from the past!I remember this thread budderfly,im surprised it made it,alot were lost in the site changeover.

I don't think I even heard about a switchover, but I haven't been on much. The two forums I posted this build thread on are a bit of a ghost town these days. I haven't kept up with where people are at anymore, just happened to stumble upon some old archives with more pics.
 

Latest posts

Top Bottom