DIY Top Drip Coco Pots

  • Thread starter roxy002
  • Start date
  • Tagged users None
roxy002

roxy002

75
8
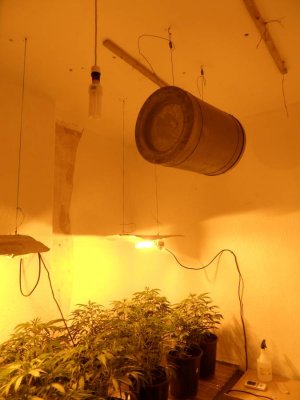
When I've got the time, I'm going to rub silicone all along the edge of the sterling board as a precautionary measure. So, if there is any more leaks it wont blow the sterling board.
 
roxy002

roxy002

75
8
Here's a shot of where I've located ballasts and electrical sockets.
 
SAM 2818 Optimized
SAM 2819 Optimized
roxy002

roxy002

75
8
Temps have dropped slightly over the last week.
RH has raised slightly.
PH increased to 6.1 from 5.8
EC the same, at 2.0
 
SAM 2810 Optimized
SAM 2827 Optimized
SAM 2820 Optimized
roxy002

roxy002

75
8
Cool design, and you write a great diy tutorial. You can use an inline bio filter if you're worried about clogging, but prob have to check it daily if coco floating around. How about some fabric smartpots to help with that? How do plan to manage the res/nutes for recirculate instead of DTW?

I'm of to order a filter as suggested.
 
dankworth

dankworth

1,519
163
I ended up going with 1/4" tees as my outlet. I did drip rings like you at one point, same type of problem, engineered same solution lol.

I think rigging a cycle timer(I am liking my cap art-dne) and periodically irrigating several times a day is the best approach.
Many small irrigations per day are better than one big one. Coco performs best at a certain saturation rate. You can irrigate them once per day, and watch the growth rate take off, then taper back down slowly throughout the day as the coco dries. If you irrigate a small amount more frequently, the coco will stay pretty saturated, which leads to higher growth rates and yield. If doing this and using drip clean you could probably get away with 10-20% runoff instead of 20-30% runoff, and still have perfect health.
 
roxy002

roxy002

75
8
Fitted all the drip rings again today after drilling them all. It was actually harder than what I thought it would be. Now that the plants are starting to fill out, it was way to bushy to see what I was doing properly. It was a really awkward job, and I ended up breaking 2 tees in the process. I'm not sure what brand these tees are, but a word of caution to anyone when dismantling the drip ring, is that they are very delicate and easily break. Obviously they don't cost a lot to replace, but I have to order mine online, so its just inconvenient for me when I don't have any spare.

Anyway, it was a time consuming job, but now they are flowing much better!:rofl

A couple of shots here, but not very good as taken on my phone.
 
Photo19 Optimized
Photo20 Optimized
2

2DogWalker

925
93
Inspirational homie, very clean design I like the tables alot...I'm designing for the next 2 months so this is definitely gonna be of a big assistance....hope you keep us up to date...good luck w the northerns bro, the cut that's been around here for ages is some serious dank but can be reallllly finicky...

2dw
 
roxy002

roxy002

75
8
My original plan was to have the 10" ducting from the carbon filter to run straight through a hole in the corner of the table. This was meant to save on the amount of ducting used, and avoid bends.

After cutting a 10" hole in the sterling board, I decided against the idea, and just fitted a section of corrigated plastic over the top of the hole. I was worried about making the hole water tight. If there was to be any leaks at all, then I would of had to disturb everything, which would of been a nightmare. It was hard enough removing all the drip rings and re-drilling the holes, so I'm pleased that I decided against it.

Also, it left me with extra space on the table.
 
roxy002

roxy002

75
8
When this grow is over with, I'll be filling the next table too, which holds another 14 plants. ;)
 
roxy002

roxy002

75
8
Inspirational homie, very clean design I like the tables alot...I'm designing for the next 2 months so this is definitely gonna be of a big assistance....hope you keep us up to date...good luck w the northerns bro, the cut that's been around here for ages is some serious dank but can be reallllly finicky...

2dw

Thank you 2dw! Pleased you find this design an inspiration, and I hope this thread helps you.

I'm still learning myself, and come across small problems all the time, but that's the fun in it, and I enjoy a good challenge.

I've heard good stuff about NL, but never grown it out. It's meant to be a quality smoke.

Good luck with your designing mate! :)
 
evu80

evu80

191
28
hey roxy

i've built all my tables in similar fashions and the one thing I cant figure out how to fix is the run off that misses the gutter cause its trickles underneath the corrugated plastic and on to the floor.

anyhow, good work, going to borrow some of your ideas and improve the drips itself. I got halos but theyre made with 1/4 inch Tee's and the main line is made of rubber tubing which leaks and sprays if the pump is too strong.
 
roxy002

roxy002

75
8
hey roxy

i've built all my tables in similar fashions and the one thing I cant figure out how to fix is the run off that misses the gutter cause its trickles underneath the corrugated plastic and on to the floor.

anyhow, good work, going to borrow some of your ideas and improve the drips itself. I got halos but theyre made with 1/4 inch Tee's and the main line is made of rubber tubing which leaks and sprays if the pump is too strong.

I'm still working on the problem with the run off dripping on to the floor. Scoring a line with a stanley knife along the underneath may have helped, along the full length. I know, that some kitchen worktops are manufactured this way, with a groove routed along the length of the worktop. So if liquid is spilt, it cant run into the base units, but instead drips down when it hits the groove. Its too late for that now that I've already constructed everything. Maybe a thin line of silicone might help, so when the run off hits the silicone it might drip down into the guttering. Its definitely something worth thinking about, so if anyone has any ideas, jump in. I don't get this problem along the full table, but just in 1 or 2 places. For now, I've just siliconed along the edge of the sterling board to keep it water proof. If all else fails, get the silicone out ha ha.

Another slight problem, the end 2 pots, at both ends of the table aren't getting the same amount of feed as the rest. The system must be losing pressure by the time it gets to the ends of the table. For now, I just top them up by hand, but I will be working on this problem when this grow has finished.
 
Dammanfu

Dammanfu

8
1
Hello Roxy I don't know if anyone has said this yet but I'm thinking you need more pitch on your tables . It looks like you only have about 1/4 inch/6mm difference in hight from back to front , if you go to 19 or 20 mm i think that would give you the pitch you need to stop water from running back to your wood
 
dankworth

dankworth

1,519
163
Drill tiny holes at bottom of channels of roofing material. Tie short lengths of that green twist tie stuff. It will guide the water into the gutter. It works for ACs also.
 
evu80

evu80

191
28
roxy,

i was thinking about apply silicone across the bottom of the corrugated plastic but havent had the time yet. How did that sanding process work out for you? I only have this issue at a couple of points on the table. I tried increasing the slope of the other end of the table but I think the main problem is the salt build up. Once the channels are build up with salts, it will decrease the rate of flow of the water which leads to it trickling backwards instead flowing into the gutter.
 
hiboy

hiboy

2,347
113
Im all about building stuff,, being an electrical contractor so i'ld like to compliment you on your time and efforts. Looks sweeto. I do have an easier way for a table set up. Buy a table, 4x8 or 3x6, and bingo ur done. Also, for a simple drip system, i ran 3/4 pvc and popped in the same groumets that u did that require 1/4" drip line. But what i did instead of drilling holes in a ring is purchase a stake that is meant to have the drip line plug into the top of it, then it shoots straight down and fills my RW cubes. I do suggest using two of these stakes for coco, for even watering, but for RW one does it. Very simple and factory made. I can get some pics if ya like. Only bummer is im drain to rez, which i think i will be changing since i have read in your thread that i can improve quality and quantity by dtw.
h
 
Top Bottom